Workstorm enables you to collaborate with your colleagues, whether they’re across the hall or around the world. We connect you with the people you work with, which is why an email invitation from someone within your company (either a colleague or site administrator) is required for first-time users to log in to Workstorm. Don’t have a company account? Request a demo to see how Workstorm can work for you.
Create a Login
Check your email inbox for an invitation to join Workstorm from your site administrator or colleague. The invitation will come from support@workstorm.com, instead of from your colleague’s email address. Be sure to check your Junk and/or Spam folders in case the email was re-routed there.
Open the email and click on the provided Verify Email Address or invite link. The account set up process will open in your default browser (i.e. For best performance use Google Chrome). Follow the on-screen instructions to create a name and password for your Workstorm account.
Workstorm’s password criteria are designed to keep your ideas, conversations, files, and overall intellectual property safe and secure within Workstorm. Our password criteria require all members to achieve a minimum password score of ADEQUATE. When creating your password, be sure to include at least one uppercase and one lowercase letter, one number, and one symbol (i.e. #, %, !, $). We recommend members create passwords that achieve a score of STRONG or VERY STRONG for the highest level of security.
Submit your password once it meets our guidelines and create your account. You’ll be taken through a series of onboarding tours before jumping into the Workstorm app. Once you finish your tours, we recommend you start by updating your profile information and basic settings, like notifications and display settings.
Profile Setup
Once you are logged in to your Workstorm account, you may customize your profile by uploading a profile image, adding contact information and adjusting your font size. Start by clicking on Settings at the top right of your Workstorm window, then click Profile.
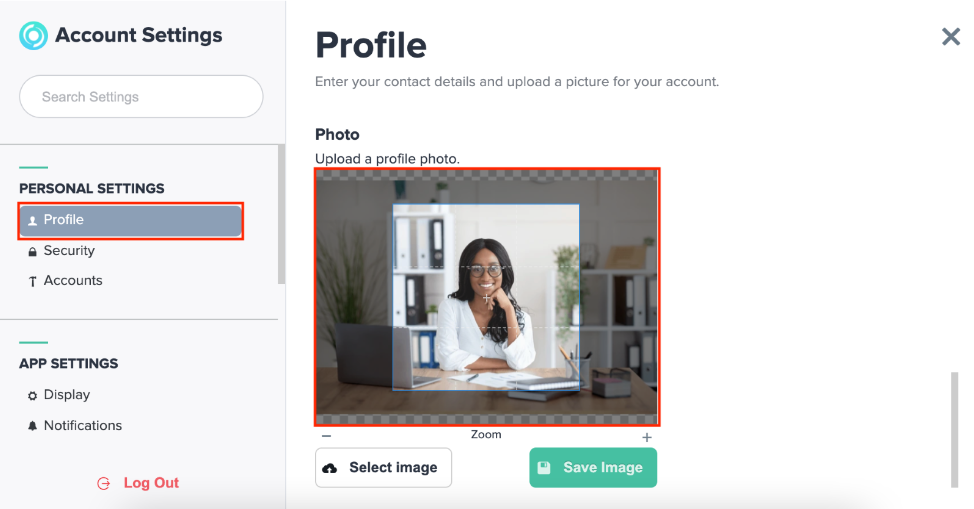
Click the Select Image button to upload a profile picture from your computer desktop. Most Workstorm members use a professional headshot or a LinkedIn photo for their profile picture. Then, use the plus (+) and minus (-) symbols below the image to zoom in and out. A box will appear to illuminate the portion of the image that will be featured as your profile picture. To change the area featured, click and hold down on the illuminated box to move around the image. Once you have selected the portion of the image you wish to feature, click the Save Image button to save your profile picture.
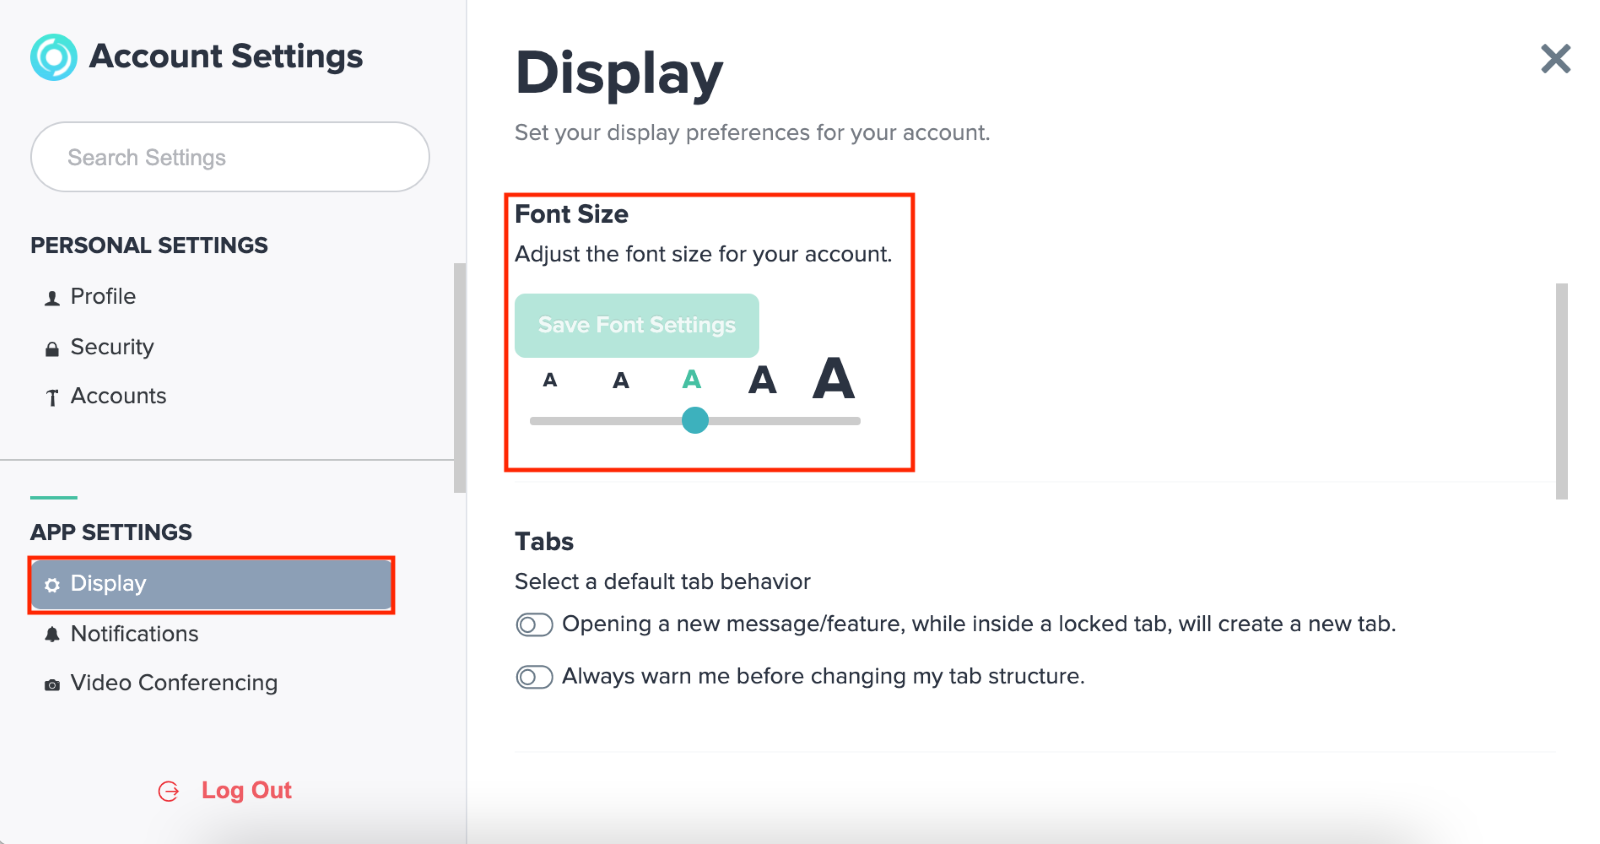
Next, adjust your app’s font size in Display under App Settings. Choose from Extra Large, Large, Default (Medium), Small, or Extra Small based on your preference as a reader.
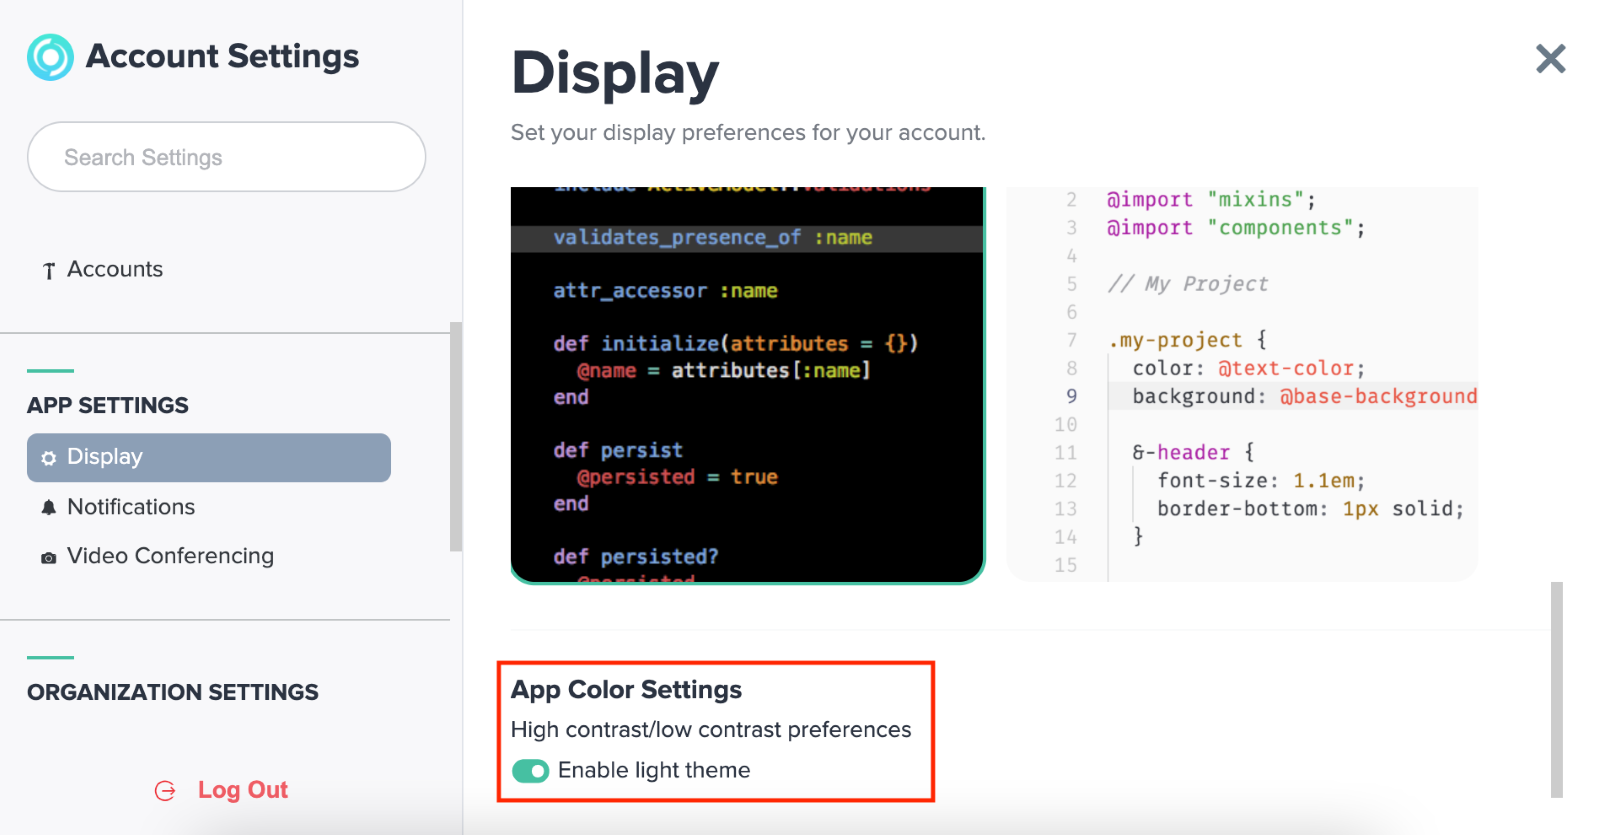
Some users may send formatted code within messages and wish to designate that code with a different colored background. You may customize the background color for messages that contain code as either Dark or Light.
Additionally, you can choose to change the color theme of your Workstorm’s instance from the default Dark Mode to a Light Mode by clicking on the toggle to the right of App Color Settings.
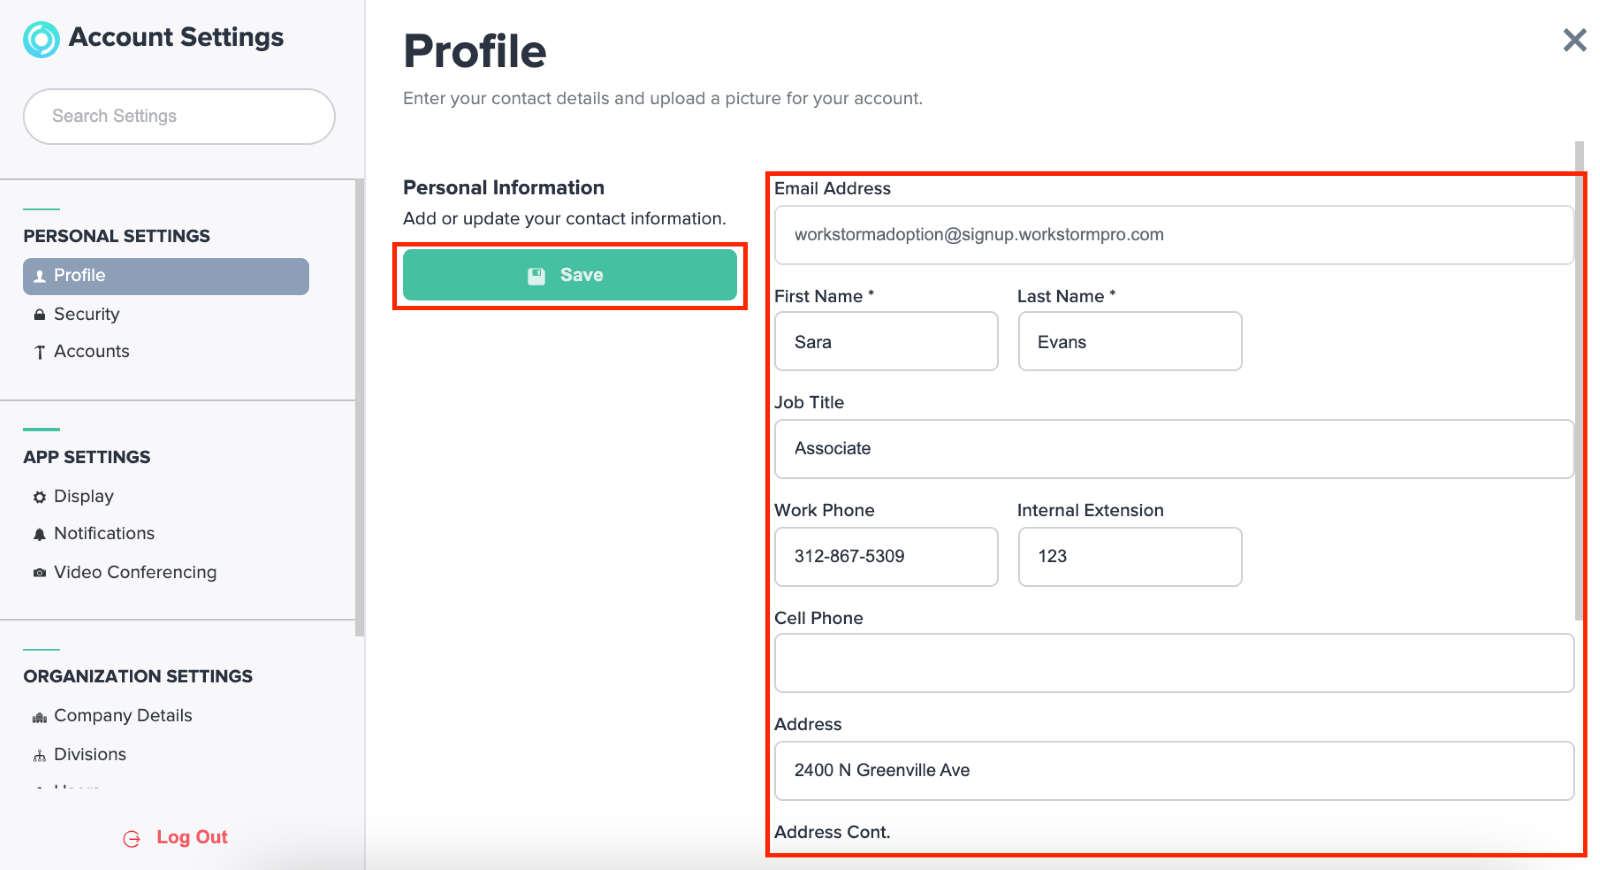
Then, enter any Personal Information you wish to add to your profile, such as your title, phone numbers and/or office location. This information will only be made visible to members within your company account and to any external members with whom you have Direct or Channel Messages.
Password Reset
You may receive alerts to periodically update your password, based on the security requirements set by your company. The Manage Account section under Settings enables you to update or reset your password at any time.
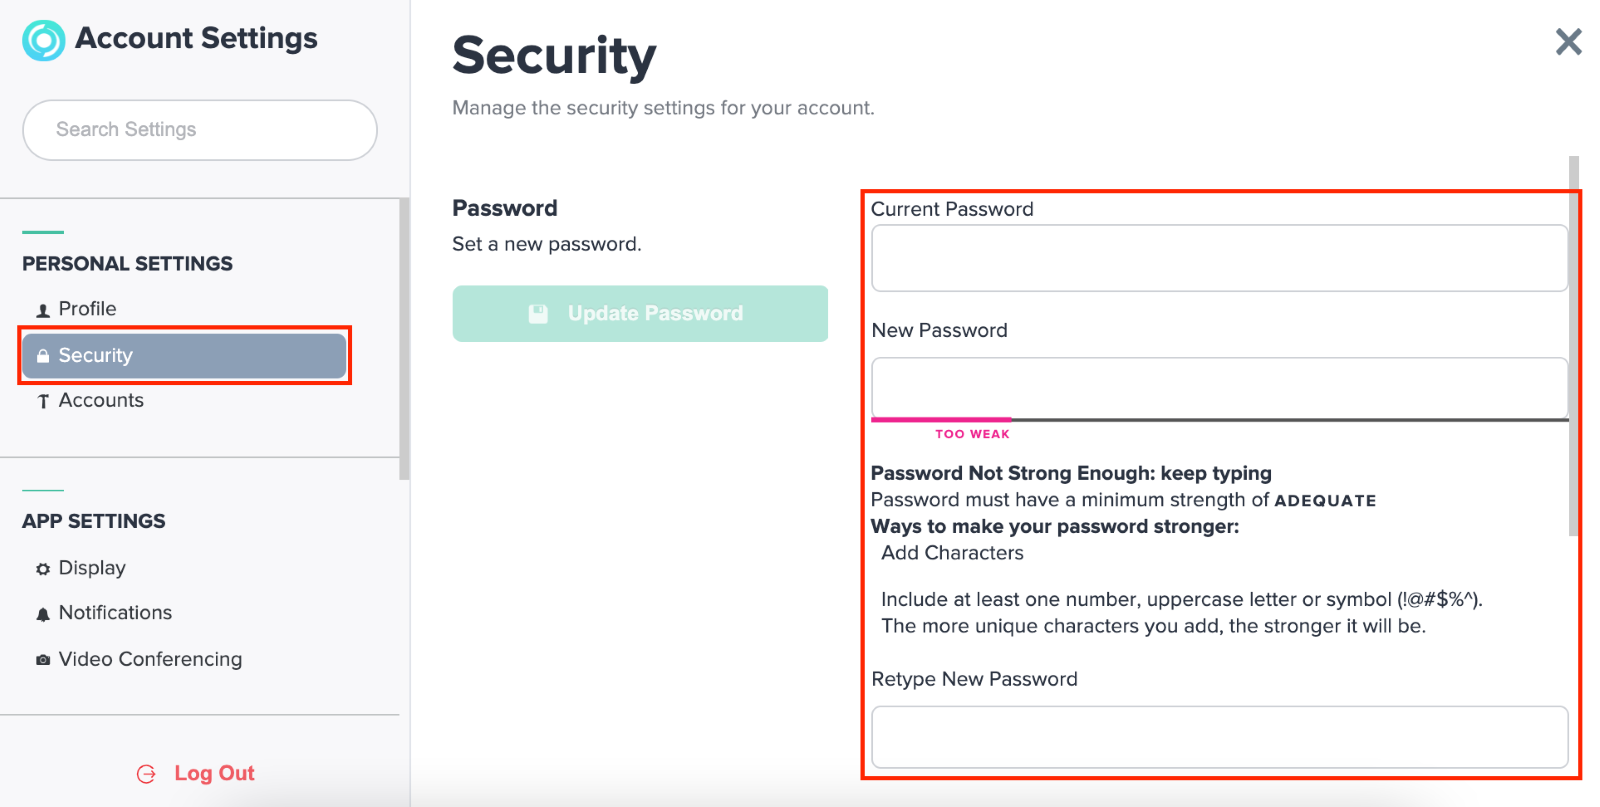
To update your password, type in your Old Password into the designated box. Then, type a New Password, using a combination of upper and lowercase letters, numbers and symbols. All passwords must achieve a security score of Adequate to be accepted. Next, Retype New Password into the designated box and click Update Password. Use this new password for all subsequent logins.
Click here for more information on changing your password.
Notifications
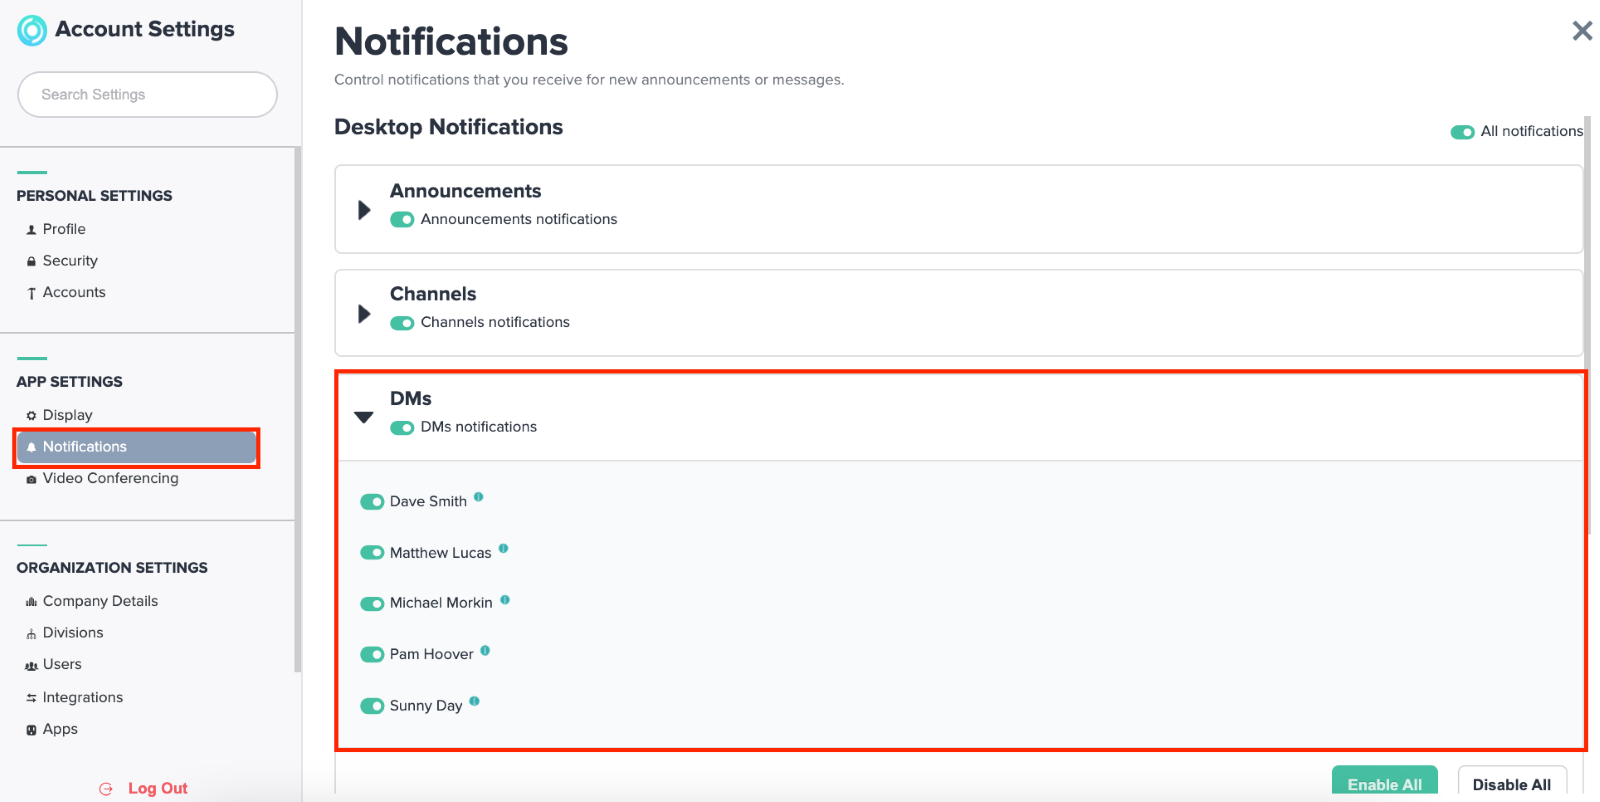
Last but certainly not least, you’ll want to customize your notification preferences for incoming messages, alerts and video calls. Start by selecting Notifications under Settings.
Next, decide if you wish to receive Push Notifications. We strongly recommend enabling push notifications, as this allows Workstorm to send a small notification bubble to your computer desktop when you receive a new message, alert or video call, even when you are not actively using Workstorm. These push notifications prevent you from missing potentially urgent, work-related messages. If you Disable push notifications, you will not receive any desktop notifications from Workstorm. Click the toggle on the right to Enable or Disable push notifications.
Once Push Notifications are enabled, you may then enable or disable notifications by type under Announcements, Channels, or DMs. We recommend new members start by enabling all notifications. This ensures you never miss a message, alert or video call from your Team or Private conversations, or Announcements from company leadership. Once you have a feel for the types of Announcements, Channel and DM Notifications you are receiving, you can customize your notifications or disable them as needed.
Additionally, you can choose to toggle on or off Workstorm email reminders that will notify you when you have messages, video conference invites, and/or alerts waiting for your response. That toggle is directly below the App notifications menu.
Click here for more information on Notifications.
After you’ve customized your profile, password and notifications, it’s time to start collaborating. Our intuitive platform is designed to help you dive in and start messaging right away!