What is a Channel?
Group collaboration is critical to the success of any complex mission, project or task. With Channels, you can collaborate amongst your own team or department, across departments, and even with external clients, all within the same seamless, secure platform.
Keep client work and documents confidential and contained within a Channel. Get your internal team aligned and regularly updating each other on ongoing projects, deadlines and priorities, without filling up each other’s inboxes. Coordinate project members across multiple departments or geographies, keeping everyone updated on progress, needs and next steps to keep the project moving forward.
These are just some of the ways Workstorm members are using Channels to get work done seamlessly and securely. Ready to give it a try?
Sending Messages to a Channel
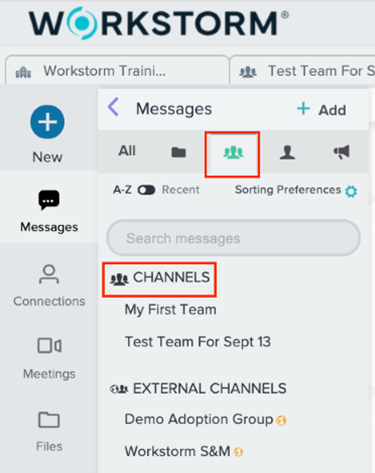
Send and receive messages or files within a group by selecting Messages in the left sidebar, then Channels. If you are already a member of one or more Channels, you will see them listed here. Click on the channel name to open the conversation and send a message or file to the group, just as you would in a Direct Message. All members of the group will receive your message or file.
Join a Channel
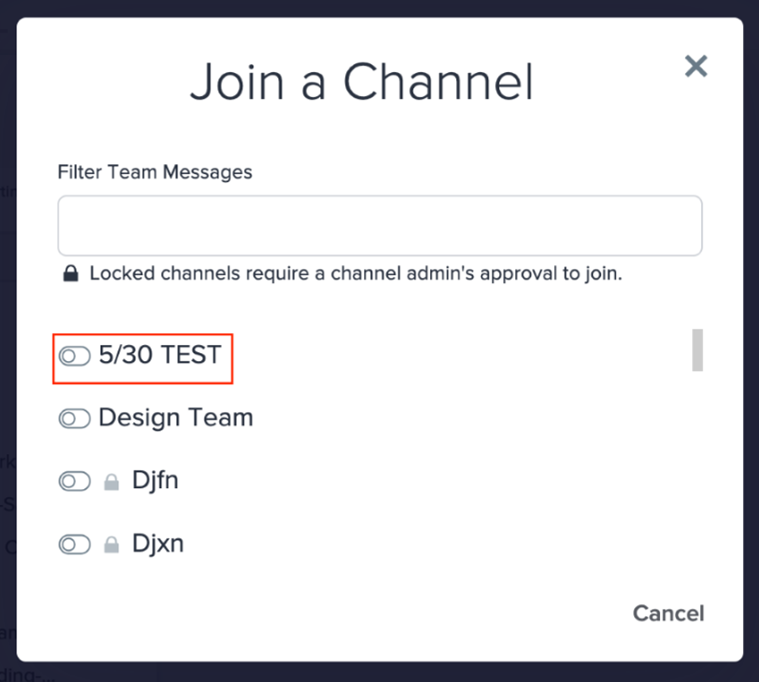
You may join a channel by clicking on Messages and then +Add. Click Join Channel to see a list of existing teams within your company or organization. To join, simply click the grey toggle. It will change to green to show that you have joined the channel. See below for Channels that have the lock icon next to their toggles.
Discoverable and Private Channels
Channels can either be publicly listed, meaning they appear in the Join Channel list, or they can be private, meaning they do not appear in the list. Private channels are often used for confidential projects or client-related work. To join a Private Channel, you must be invited by the Channel Administrator (i.e. the person who created the channel).
Open and Approval-Required Memberships
Discoverable Channels appear in the Join Channel list and will either allow open or approval-required membership. Any member can instantly join an open membership channel by simply clicking the grey toggle. Channels that require membership approval have a lock icon beside the grey toggle.
To request to join a channel that requires membership approval, click the grey toggle and a membership request notification will be sent to the Channel Administrator.
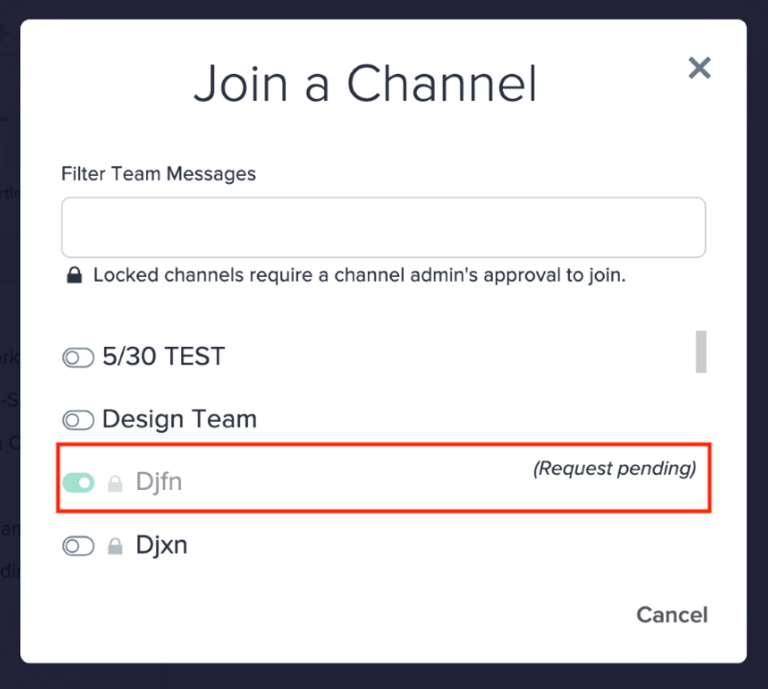
If the Channel Administrator approves your request to join, you will receive a toast, or notice, of your admission and the toggle will change to a green toggle, designating that your membership has been approved. A toast will also appear if your request for access has been denied.
Create a Channel
To create a new channel, click the +New button in the top-right of the window or +Add in the Messages menu. Then, select Channel. This will open the Create a Channel window, where you can name your channel to get started.
Adding and Removing Channel Members
After you create a Channel, the Invite Members window will open. You can also open this window by clicking on the Settings icon to the right of the Channel window.
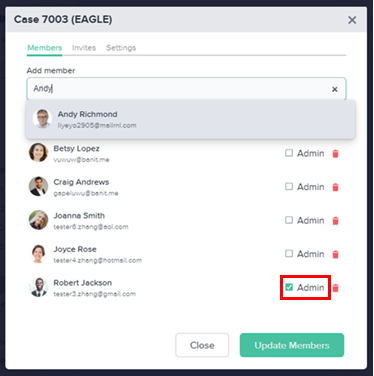
To invite a member, type the first few letters of their name or account into the search bar. Then, select them from the list of users and click Update Members.
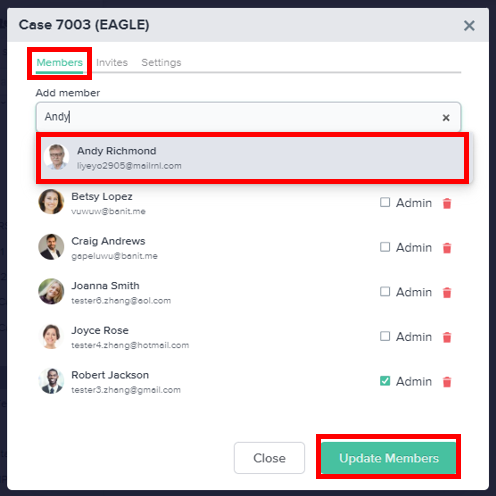
To remove a member from your channel, simply click the red Delete button next to the Admin checkbox in this same window.
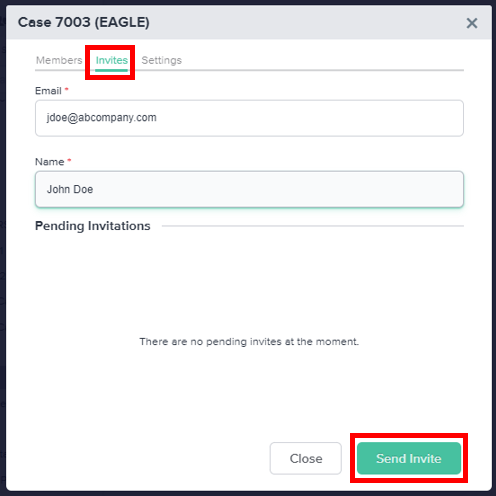
You may also choose to invite members by email using the Invites tab to the right of the Members tab. Enter the person’s email address, first name, and last name. Then, click Send Invite to send an email invitation for the member to join your channel.
When a person successfully joins your channel on Workstorm, you will receive a notification and an alert. As the Channel Administrator, you may add or remove channel members at any time by clicking on the Members tab and selecting the red Delete button to the right of their name.
Adding External Channel Members
Sometimes it’s necessary to collaborate with members that are outside your company, such as a contractor, client, or agency. If a member is external, a globe icon will appear next to their name so that all members are aware that the person is external. If a Channel contains external members, an orange globe icon will also appear next to the Channel’s name.
If you wish to add a new external member to your Channel, invite them by clicking the Invites tab and then entering their contact information. You will receive confirmation that you are inviting an external member to the channel after you click Send Invite.
The ability to invite external members is set by your company policy and your Site Administrator. Read our article on inviting external members, or check with your Site Administrator if you have any questions.
Assigning Channel Member Roles
You may also designate additional Channel Administrators to help you manage channel memberships and settings. To add a Channel Administrator, click on the Settings icon and then Members to see the Channel roster. Select the checkbox to the right of their name to change the member’s role from Member to Administrator.
Members of a Channel have general user functionality, including the ability to send and receive messages and share files within the group. Administrators can add or remove members and other administrators, approve or deny membership requests (if channel membership requires approval), and change the Channel settings or name.
Settings and Notifications
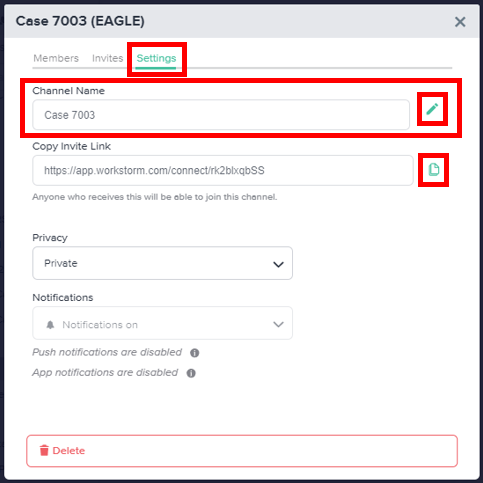
Click on the Settings tab. To change the name of your channel, click on the green pencil Edit icon next to the Channel Name box. To invite someone using the Channel’s Invite Link, click the green Copy icon and paste it into a message.
Designate your channel as Private or Discoverable (i.e. whether it will appear in a Channel search)/ When you create a Channel, the default setting is Private. Click on the Settings tab and then select the Privacy dropdown to update the Channel to Discoverable or Discoverable (require approval).
A Channel that is Discoverable, but Requires Approval means any member of your company or organization’s Workstorm account may submit a request to the Channel Administrator for approval to join this channel.
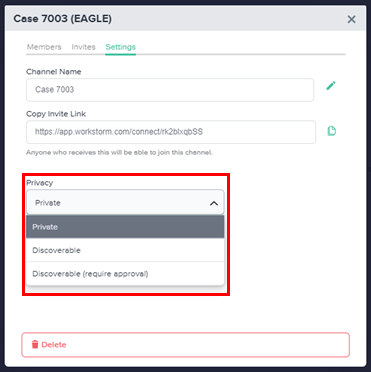
If you want the Channel to be Discoverable and not to require any approval to join, click the Privacy drop down and select Discoverable. A Discoverable Channel means any member of your company or organization’s Workstorm account may search for and join this channel without any approval process needed.
Within this same settings window, the notifications dropdown enables each channel member to turn on/off Notifications of new messages and activity within the channel. Click the dropdown to bring up an option to turn off Notifications for this channel.
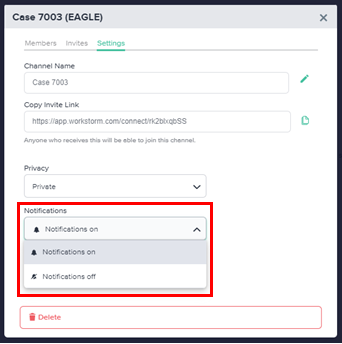
To delete the channel, click the Delete button at the bottom of the Settings tab. Alternatively, channel Administrator(s) can delete the channel by clicking the ellipses next to the channel name in the left sidebar and selecting Delete. Only the channel Administrator(s) can delete the channel.
To leave a channel, members click the leave button at the bottom of the Settings tab. Channel members can also leave a channel by clicking the ellipses next to the channel name in the left sidebar and selecting Leave.
From access parameters to membership requirements, member roles to notifications, Channels can be customized to suit the collaboration needs of any group project, mission, topic, or task. Tap into Channels and see how the right kind of group collaboration can mean the difference between working hard and getting things done.