Channels are group conversations that are managed by individual members or by Streams. Any user may start a Channel with other members of the same organization, as well as join public Channels.
Create a Channel
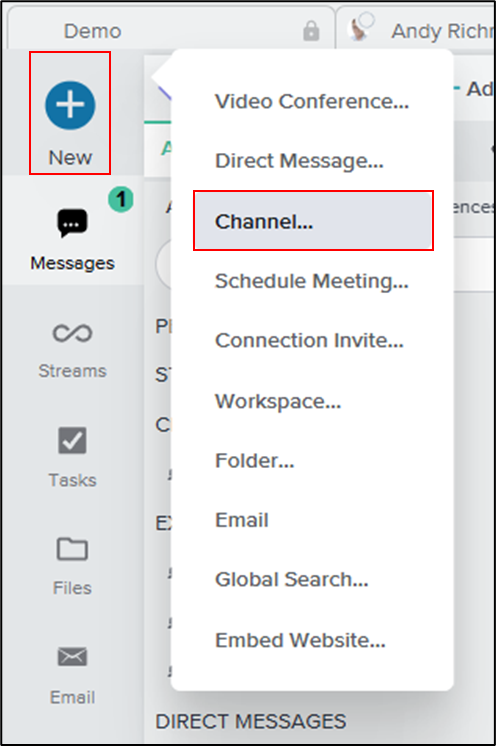
The creator of a Channel is by default the Channel Admin. To create a Channel:
- Click the blue New+ button at the top-left corner of the screen and select Channel.
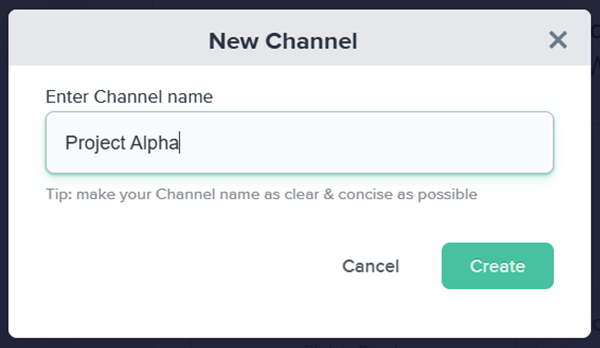
- Enter a name for the Channel and click Create.
Add Members
Once a Channel is created, the Channel Admin can add members:
- In the Channel Settings pop-up menu, search for the users you want to add.
- To appoint an additional Channel Admin, check the Admin box next to the member’s name. To remove a member, click on the red trash icon.
- Click Update Members.
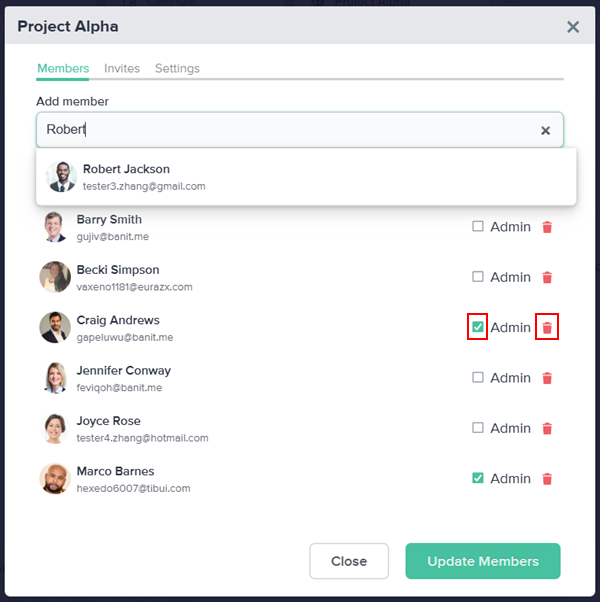
Alternatively, a Channel Admin can copy the Channel’s Invite Link and paste it into another Channel, a DM, or an email to invite additional members. The Invite Link, in addition to emails sent in the Invites tab, may be used to create an External Channel.
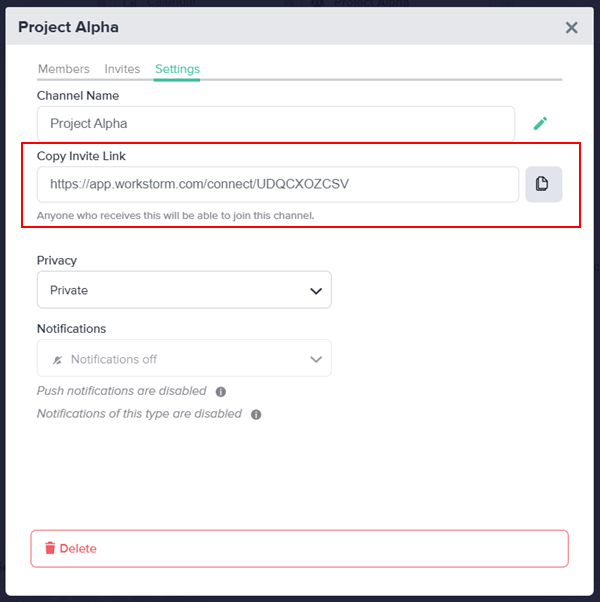
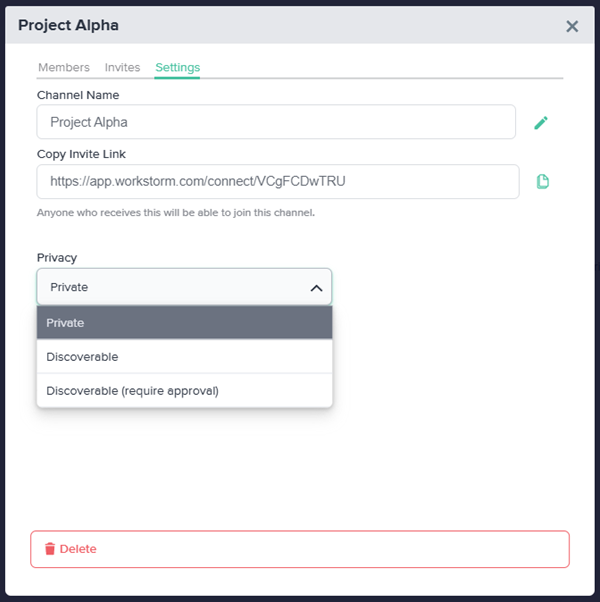
Manage Channel Settings
To rename the Channel, click on the green pencil icon to the right of the Channel name. Input a new name and click Rename.
To adjust the Channel’s Privacy settings, click on the dropdown under Privacy and select one of the following options:
- Private: The default privacy setting. Members must be invited by a Channel Admin.
- Discoverable: Any member of the organization may search for and join the Channel without an explicit invitation.
- Discoverable (require approval): Any member of the organization may search for the Channel and submit a request to join.
To delete the Channel, click the Delete button at the bottom of the Settings tab. Then, click Yes to confirm.