This article outlines settings for both PC and Mac so that your video conference experience is smooth from the beginning.
Get your PC ready for a Video Conference
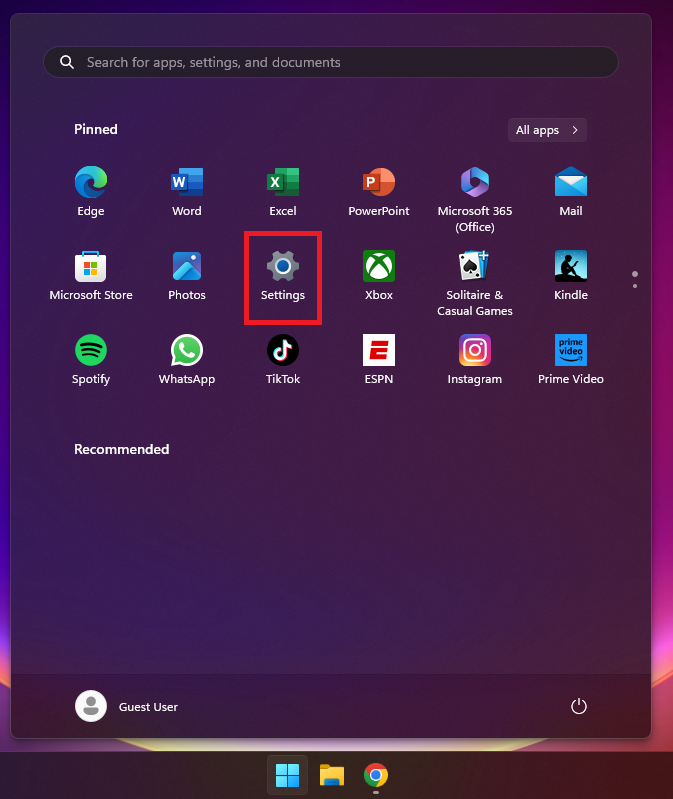
Click the Windows key on your keyboard or the Windows start button in your taskbar.
The start menu will pop up on your desktop. Click the Settings icon in the top Pinned section of the pop up. If there is no Pinned section, or if the settings icon is not visible, search Settings in the top search bar.
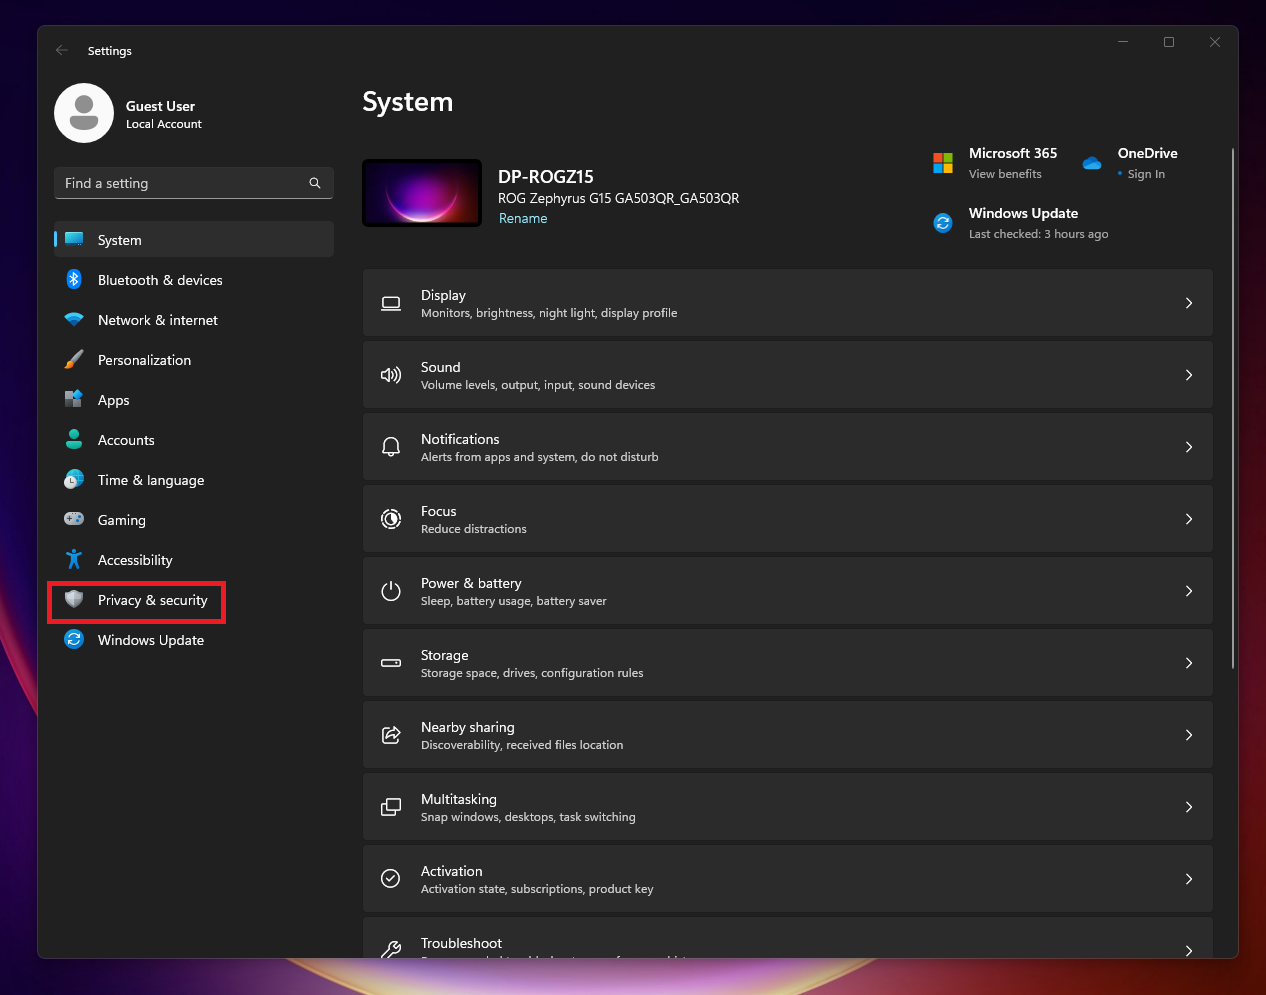
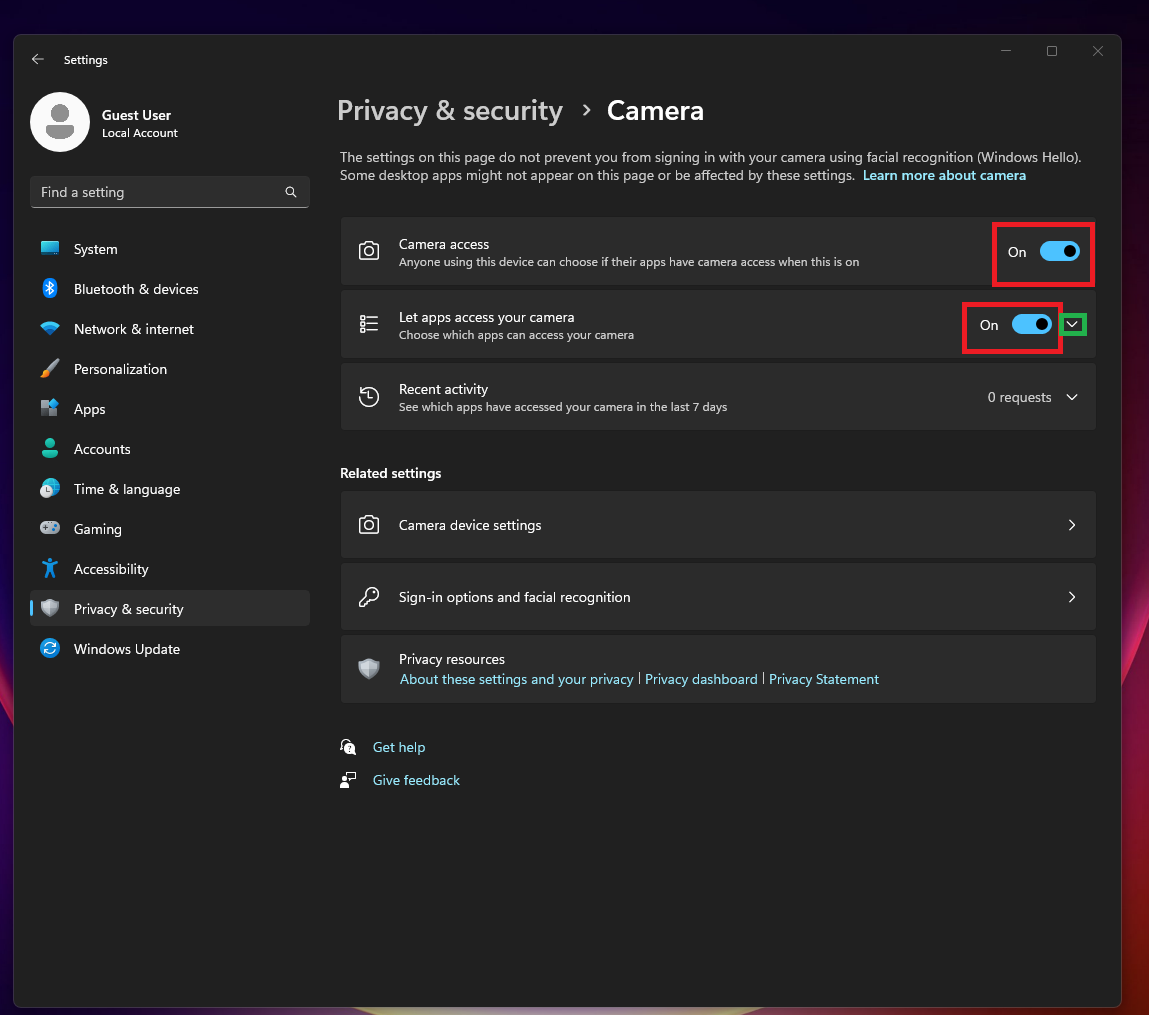
Click the Privacy & security button in the left panel. This will open the Privacy & security settings.
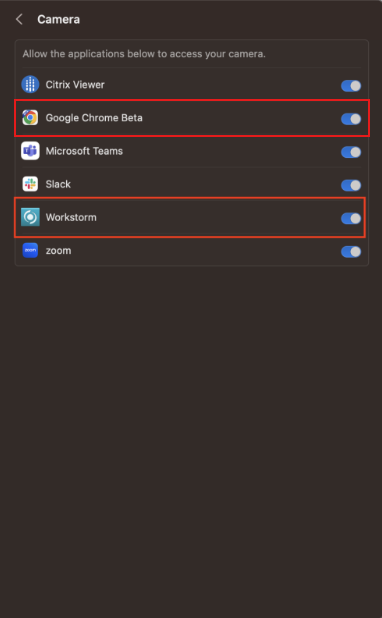
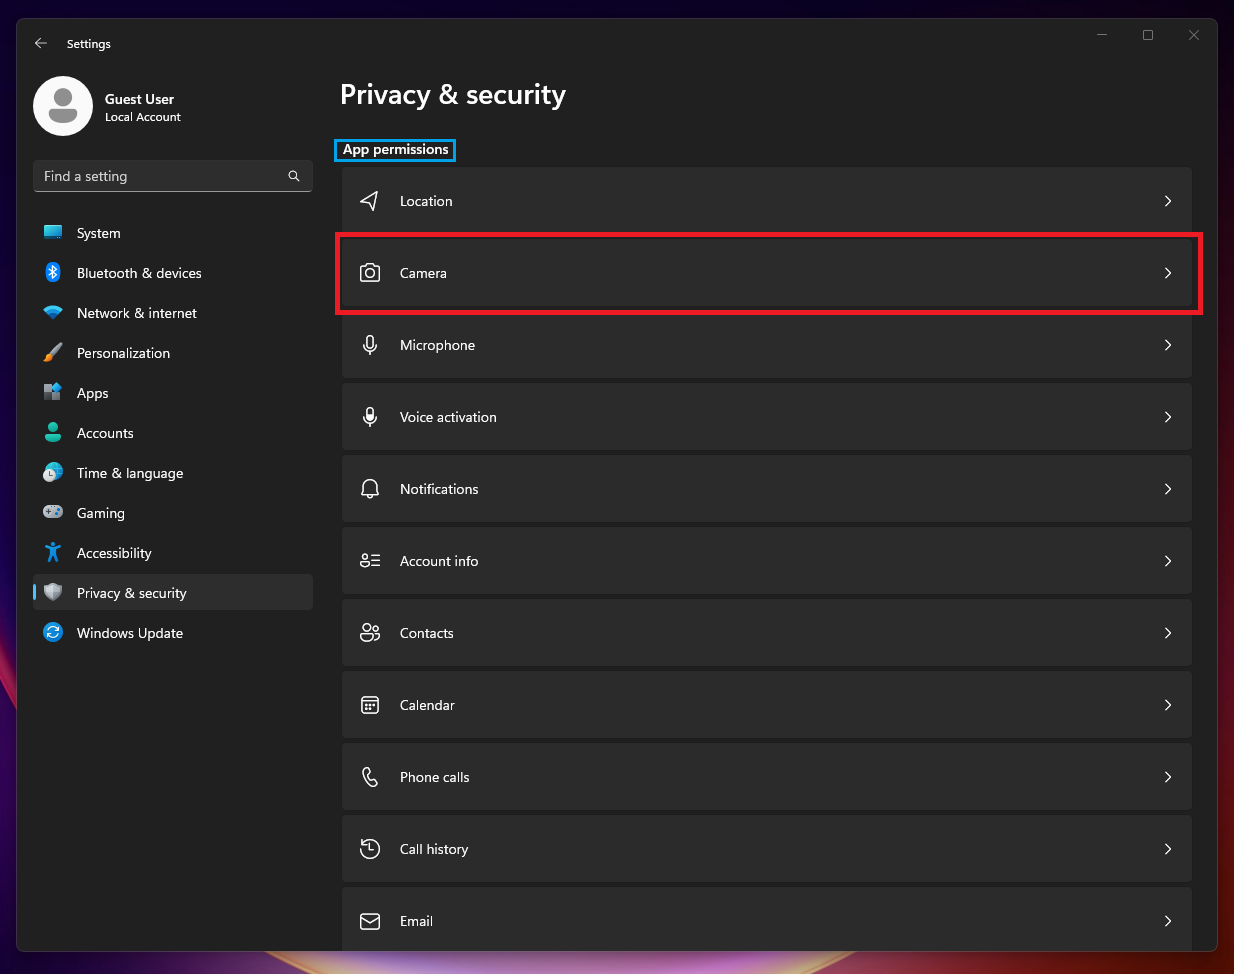
Scroll down to the App permissions section. Click on the Camera section. This will open an expanded view of camera permissions and settings.
Toggle Camera access and Let apps access your camera on. Click on the dropdown arrow on the right of the Let apps access your camera section. This will open a list of apps that have camera access enabled/disabled along with other permission settings.
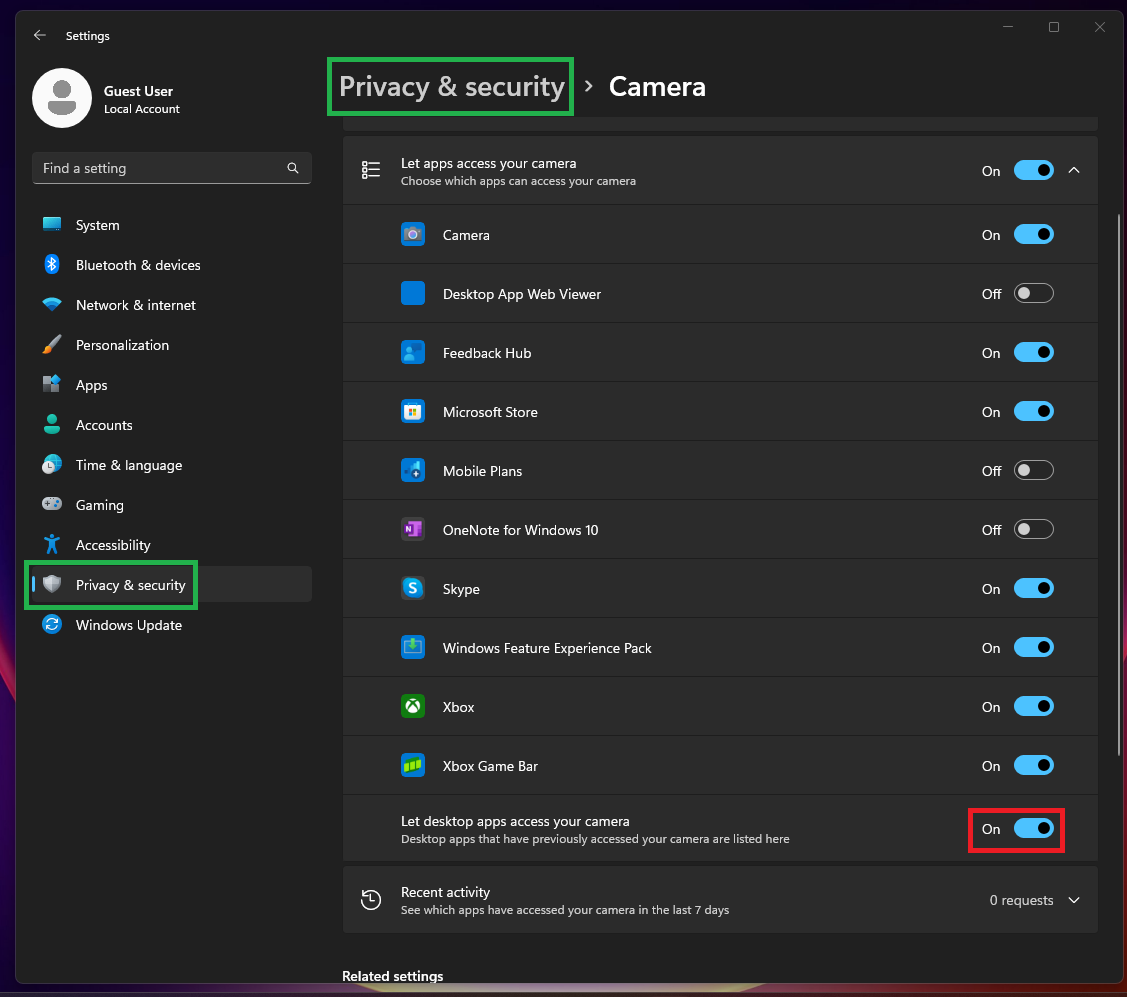
Toggle Let desktop apps have access to your camera on. You may have to scroll down to find this setting. After ensuring all camera permissions are correct, click on Privacy & security in the top location header or click on Privacy & security in the left panel. This will navigate you back to Privacy & security settings.
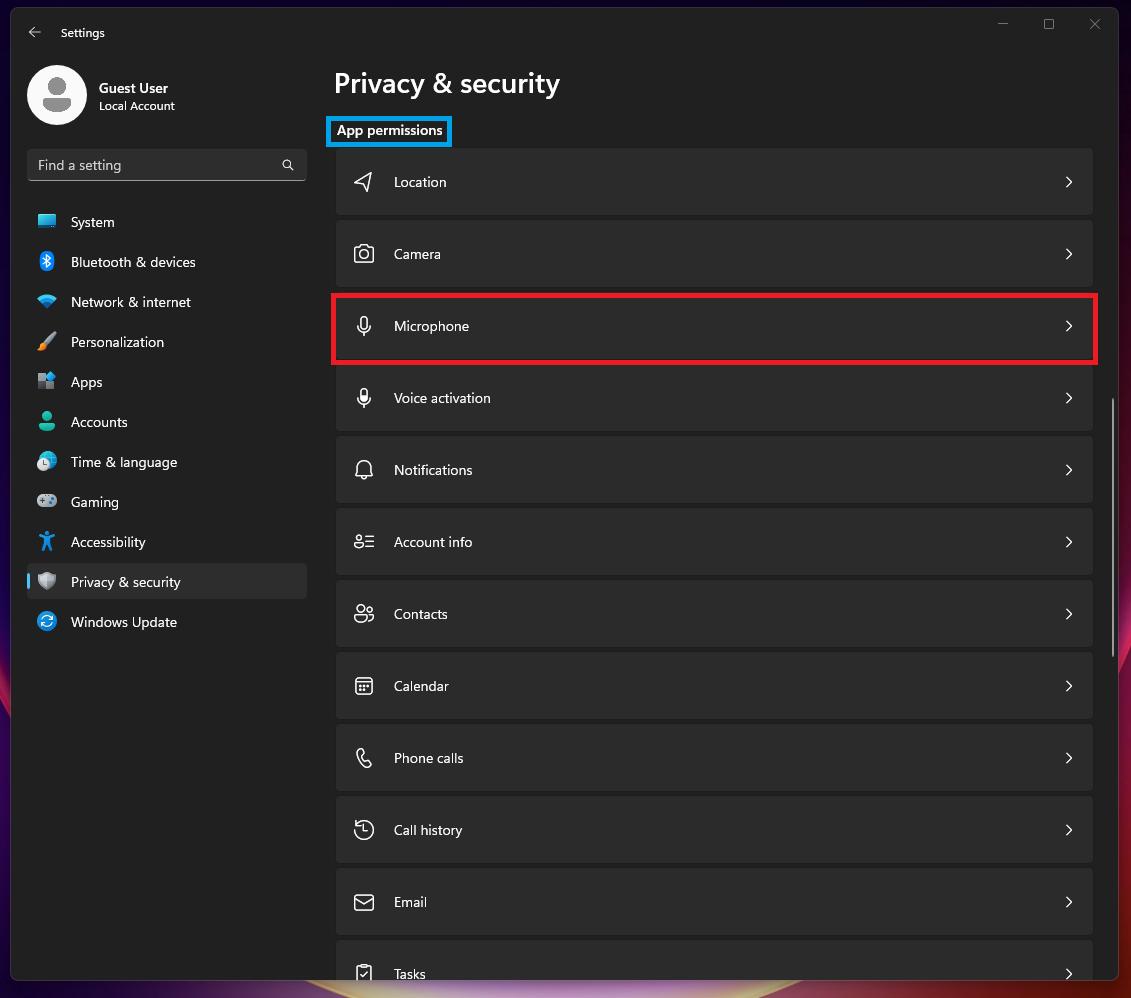
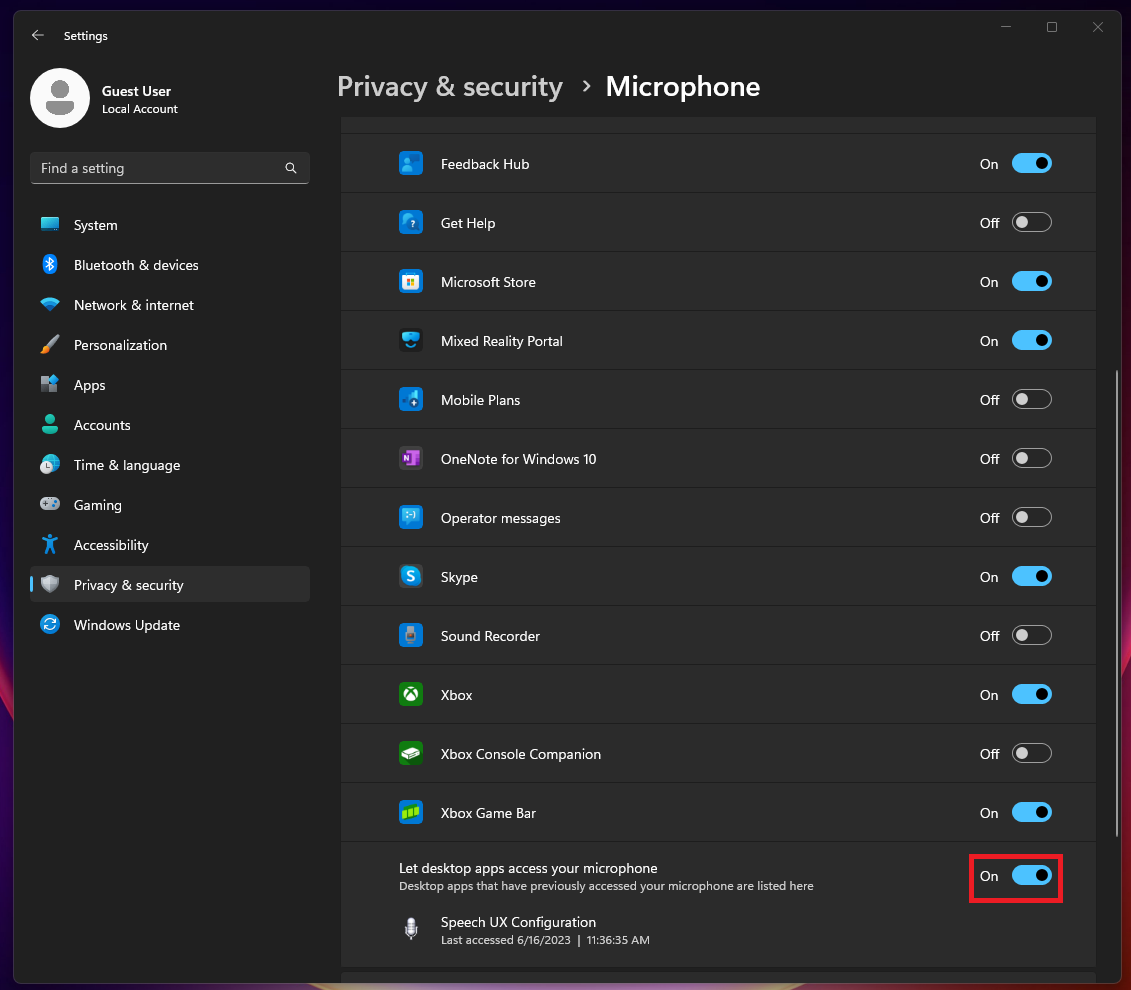
Scroll down to the App permissions section. Click on the Microphone section. This will open an expanded view of microphone permissions and settings.
Toggle Microphone access and Let apps access your microphone on. Click on the dropdown arrow on the right of the Let apps access your microphone section. This will open a list of apps that can have microphone access enabled/disabled along with other permission settings.
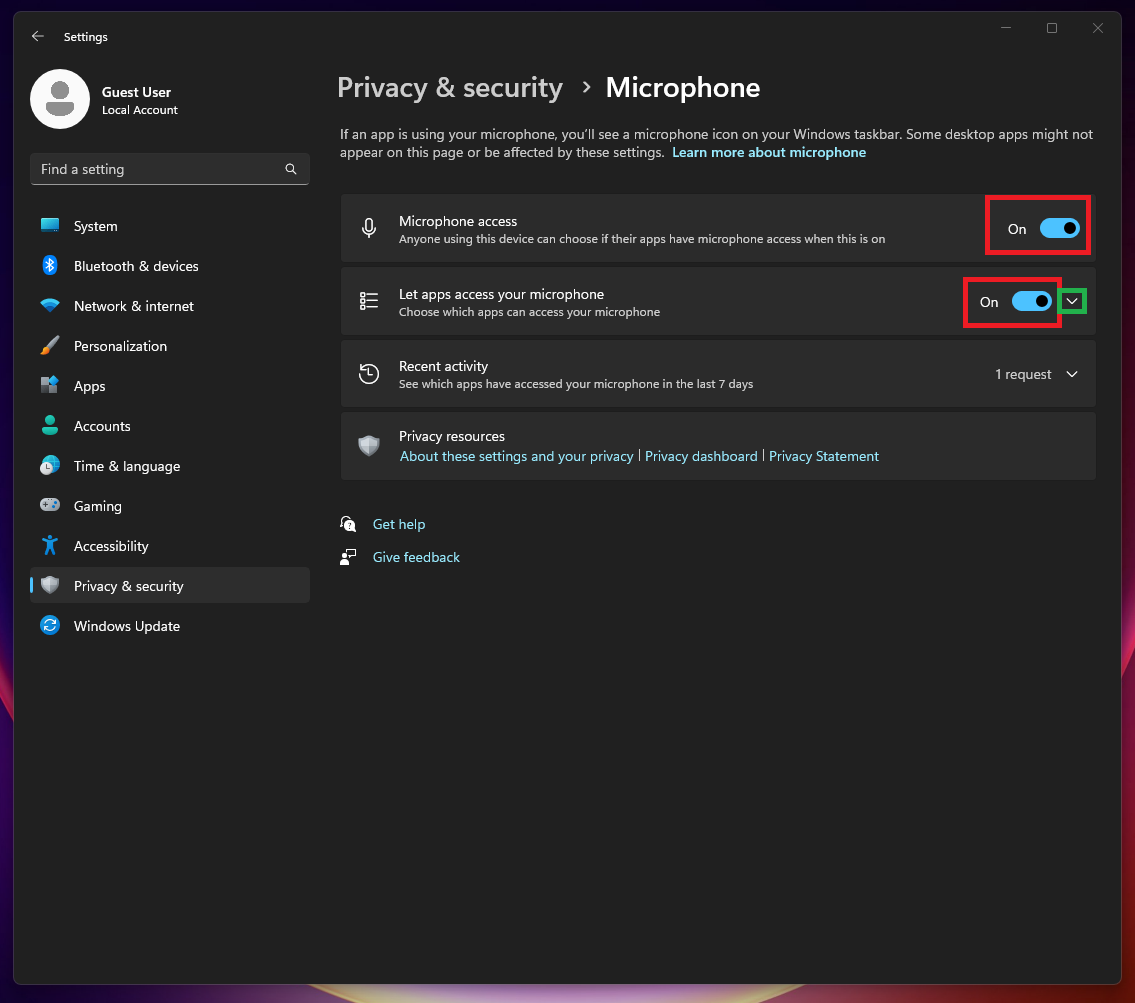
Toggle Let desktop apps have access to your microphone on. You may have to scroll down to find this setting. Ensure all microphone permissions and settings are correct.
Note: You do not need to adjust any settings to enable screensharing on Windows.
Get your Mac ready for a Video Conference
Click on the upper-left Apple icon menu and open System Settings.
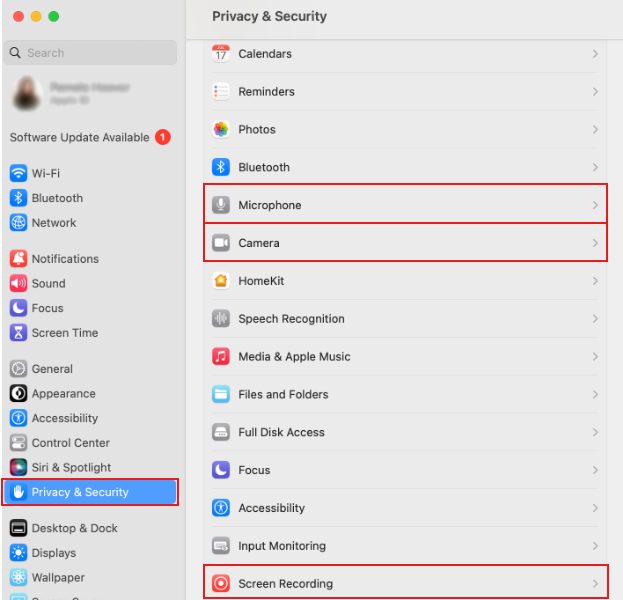
Individually select Camera, Microphone, and Screen Recording and ensure they are enabled for your preferred web browser and Workstorm.