What are Workspaces?
A well-organized workspace reduces stress and clutter, while increasing efficiency and productivity. When everything has its place, you know exactly where to find it, exactly when you need it. That is why we created Workspaces, to give you a clean, organized place to manage all the moving parts for each of your ongoing projects.
Workspaces are designed to help you view multiple conversations in one dashboard. Over time, the number of conversations you have will grow and you may outgrow your first workspace.
Adding new Workspaces enables you to organize many ongoing Direct and Channel Messages into broad, related categories or topics, such as by project or by client.
There is no right or wrong way to organize your Workspaces. What’s important is doing what works best for you.
Creating a Workspace
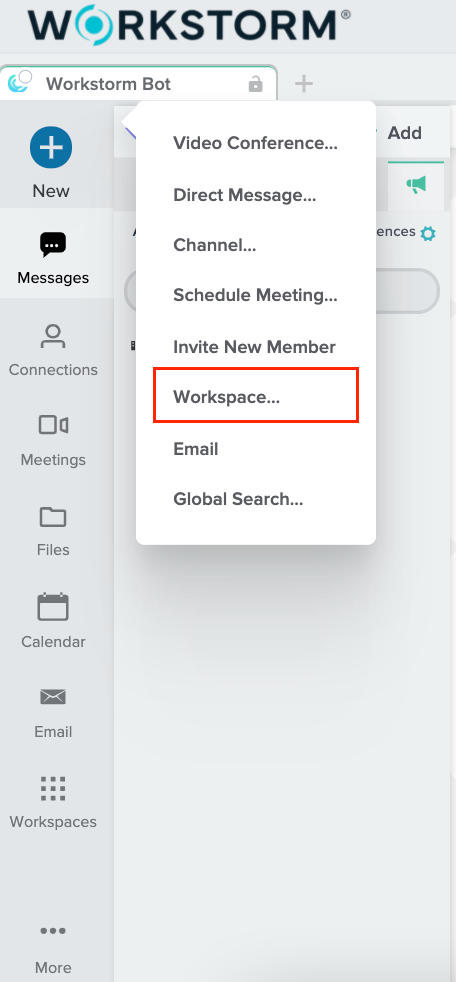
To create a new Workspace, click on the +New button at the top left of your side bar and select Workspace.
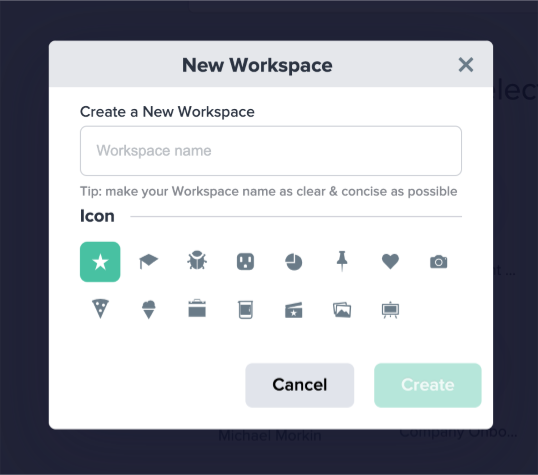
Name your new Workspace and click Create.
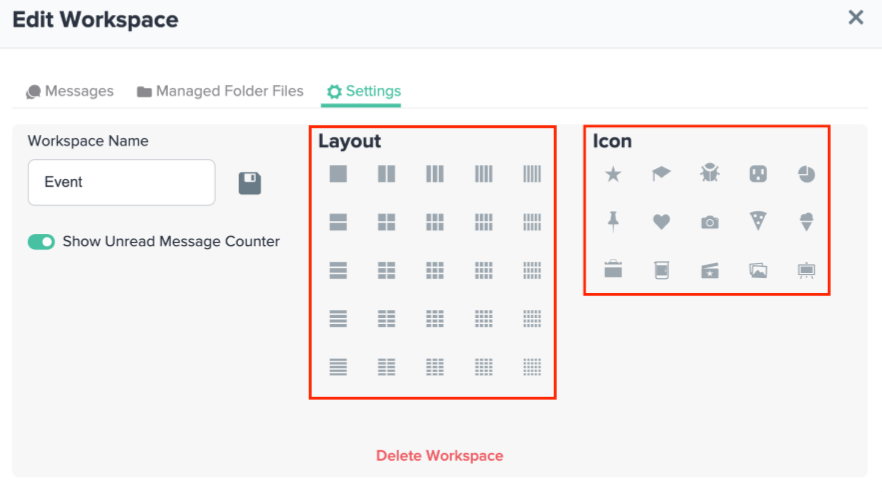
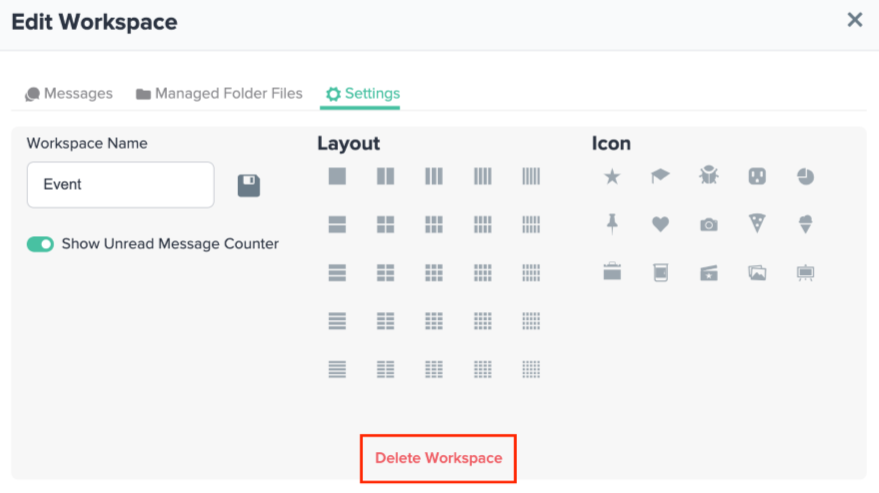
After creating your new Workspace, the Edit Workspace menu will open automatically in a new tab. Here you can choose a particular grid style layout, change the icon that represents your Workspace and rename it.
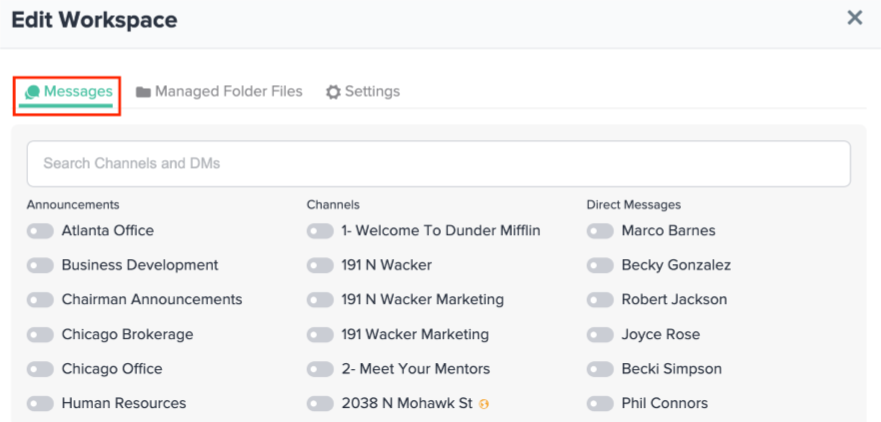
To add Direct and Channel Messages or Announcements to your Workspace, switch to Messages in the Edit Workspace menu and toggle on your desired messages.
You can access this Edit Workspace menu at any time by clicking the green gear icon to the right of the Workspace’s name near your top bar in Workstorm.
When it comes to the layout of your Workspace, some members prefer to view their workplace conversations all at once in a 2 x 3 tiled grid, while others prefer a 1 x 3 vertical column or a 2 x 1 horizontal list. We recommend testing out a few different layouts before settling on the one that works best for you.
Once you have chosen the right layout, you may reorganize the order and arrangement of your conversations within that layout. Simply click, hold, and drag a conversation tile to a different location within the layout.
If you need to delete your Workspace, select the Workspace Settings gear and click on Delete Workspace at the bottom of the Settings menu.
Workspaces are designed to help you stay organized in whichever way works best for you. Create as many or as few Workspaces as you like. Categorize them however you want. Customize your layouts, displays and notification preferences to make your Workspaces efficient for you.